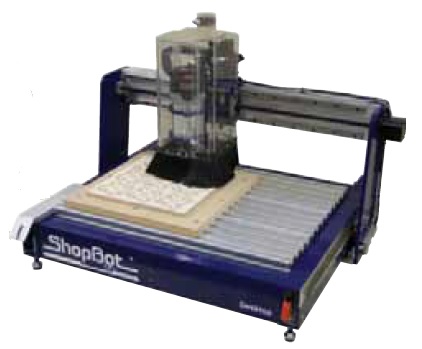
The ShopBot is a router that is controlled by a computer and can be used for various woodworking-type operations. The Prentke Romich Collaboratory at Case has a ShopBot CNC router that can accept a 4' x 8' sheet of material. (http://engineering.case.edu/thinkbox/equipment/shopbot) With the shop here at the farm shaping up and an excessive supply of rough sawn lumber and other wood, a ShopBot seems to be a good fit. However, the limited floorspace in the shop suggested that a smaller unit would be more appropriate. ShopBot makes a desktop unit. Romich Foundation purchased a Desktop for Northwestern Local Schools and they graciously hosted a visit and demonstrated their machine. So that is what I ordered in early 2015. ShopBot Desktop. About a year later, Romich Foundation purchased another ShopBot Desktop for Norwayne High School.
The Desktop has a footprint of 32" x 36" and a working area of 18" x 24" This is cerrtainly sufficient for most of what I might want to do. If I need to do something larger, I can use the Case unit or at least one other in the community of which I am aware. Also, it is possible to work on longer pieces as they can extend through the machine. However, care may need to be taken to locate the project properly.
The software used to control the ShopBot is called VCarve Pro. It has two primary areas, Design and Toolpath, and supports a wide range of work.
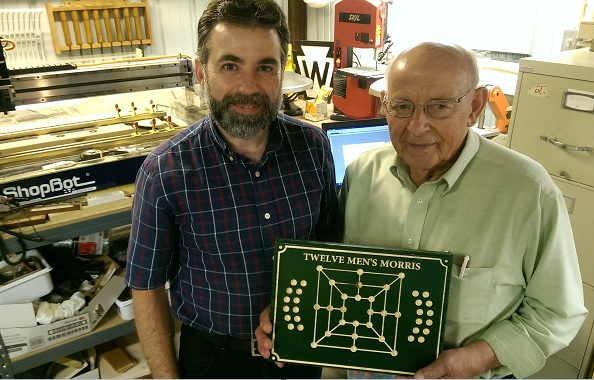
Tom Hammond and Dave Gehman recently visited to make Twelve and Nine Men's Morris game boards. The material is 1" thick stair tread cutoffs from the Habitat for Humanity ReStore. Tom cut the pieces to size, used a standard router to create 1/4 round corners and sanded and painted them. He also designed the layout. The circles are shallow V holes that hold marbles. The lines are 0.050 deep. Everything was done using the 1/2" V cutter.
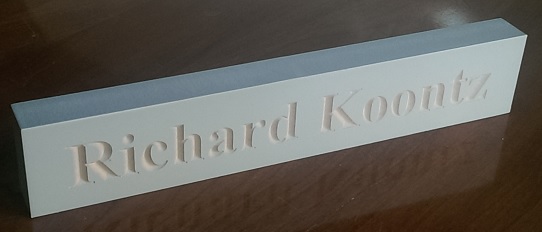
Other results that came off this ShopBot included the following:
This is a 9" long painted MDF* desk name block.
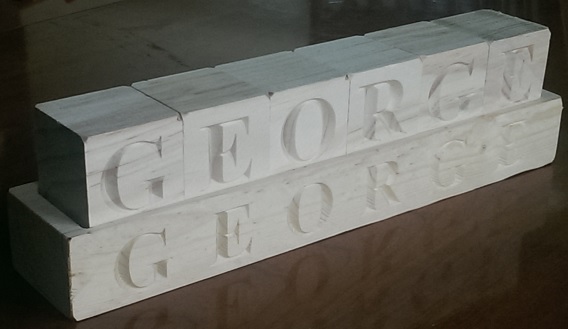
These blocks are 1-3/4" cubes from Pat Catan's Arts and Crafts Stores. The base was cut from a scrap of 2x6. The base has a 1/4" deep pocket to hold the blocks in place. The lengtch of the pocket is 1/8" more than the combined blocks. Download files: Base pocket (GEORGE): design file and toolpath file; Base front (GEORGE): design file and toolpath file. Early testing confirmed that it's a good thing to hit all corners on the belt sander to remove the sharpness.
P Graham Dunn in Dalton graciously donated scrap and outdated material to Wayne College. That material included the basis for these items.
"Michael" was CNC routed.
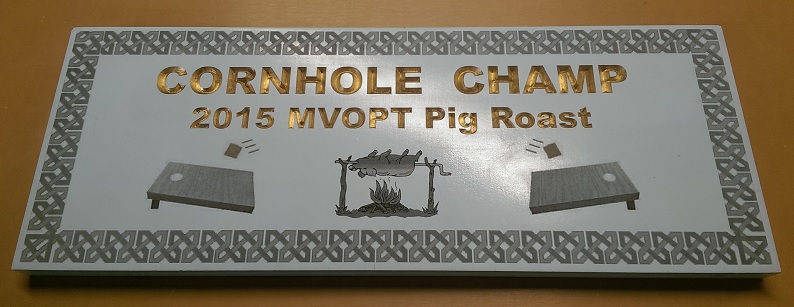
The lines of text were CNC routed and the remainder was laser engraved.
The letters were filled with gold paint. The surface was already painted, so wiping the excess paint off was easy.
Other techniques that are used to provide contrast, expecially on unpainted wood, are to spray the surface before routing with a color that is a contrast to the wood or to spray after routing and then sand the surface to remove the surface paint, leaving the routed part painted.
-------
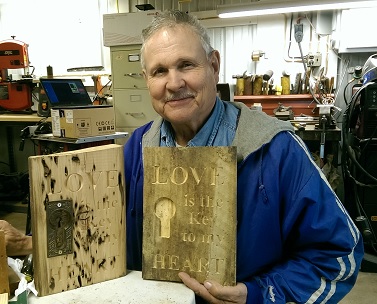
Friend and neighbor Lyle Kalina came up with this project. He had an antique pocket door keyplate and an old piece of wood with lots of worm holes. After settling on the wording, we programmed the ShopBot to mill a recessed pocket for the keyplate and V-carved the lettering. Then Lyle finished the piece, painting the letters.
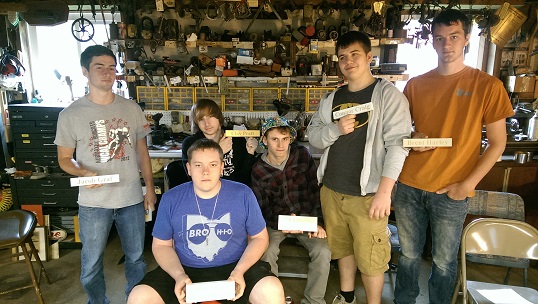
Six Norwayne High School woodworking students visited and each made a couple name blocks.
Stand and Hold-down System
- - - -
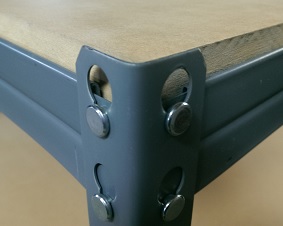
For the stand, I started with a 36" x 72" steel shelving unit from Lowe's. I used four of the 3' vertical corner pieces and eight of the 3' shelf support brackets. I had been given some stainless angle and put a metal cutting blade on the chop saw to cut 45 degree angles that I welded together to form the base. 3" rubber swivel casters (2 locking; 2 non-locking) were welded to the bottom of the base. The shelf posts fit inside the corners of the base frame. Three 3/4" MDF shelves (2 x 35-7/8"; 1 x 36-1/2" square) were added and the top corners of the corner posts were rounded off for safety.
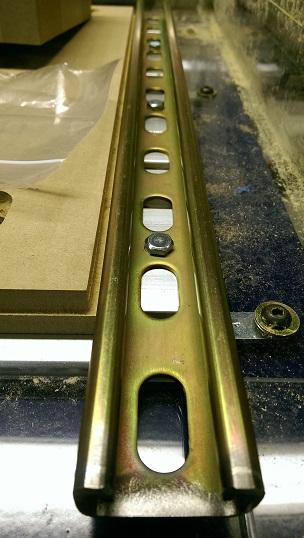
I wanted to have a quick and easy way to hold small pieces during the cutting process. Further, I didn't want to chew up the sacrificial MDF sheet that comes with the ShopBot. I found that 1x12x8' painted MDF boards are available at Lowe's for not much. Then I got a 10' length of 13/16" UNISTRUT to make hold-down rails. I cut it into lengths to add to the ShopBot base on each side of the original MDF. Then I cut two lengths around 28" to serve as the sliding front and back bars to secure the new 1x12 sacrificial base.
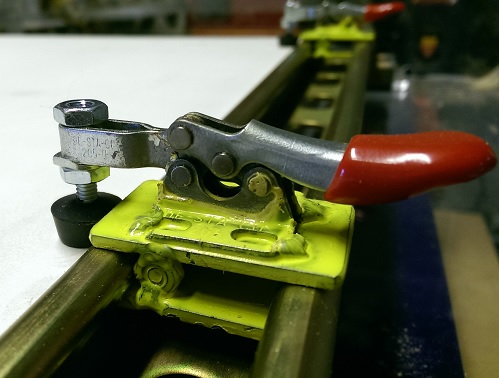
Six small toggle clamps were welded to bases cut from 12 ga. 1" bars and welded to allow them to slide left and right in the UNISTRUT.
-----
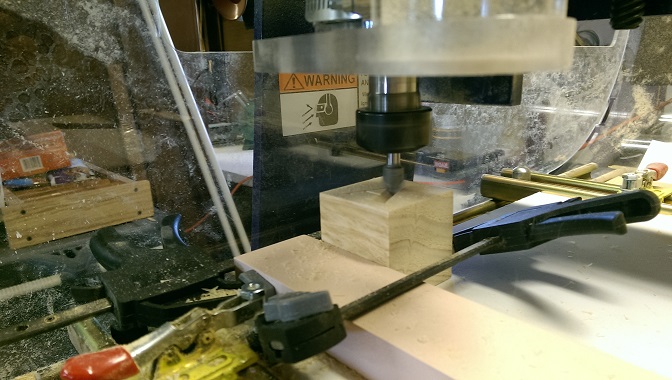
As an anchor for clamping the small parts to be cut, a 1x2-1/2 MDF was attached to the new base using two fluted 3/8" wood gluing pins. The back edge is at Y=2.5", on a reference line that was cut into the 1x12 base. This anchor piece overhangs the left side and another gluing pin serves as the X=0 stop for aligning the workpiece. Later I added a strip of sticky back foam qasket to the upper edge of the back side and 1/2" angle iron to keep the workpiece and this piece from pulling up during milling operations. The UNISTRUT rails made this kind of thing easy to do.
So using this setup, an early step in firing up the ShopBot is resetting the Y zero to 2-1/2".
Finally, small clamps are used to hold the workpiece against the 1x2. This system makes it easy to set up and remove pieces.
For doing larger items of 3/4" thickness, the 1x12 base can easily be removed so that the toggle clamps can hold down the workpiece, making it easy to get in and out.
For working with larger items that need a fully available top surface, a short piece of 1x12 MDF with holes is used with the above clamps. The workpiece is screwed to the MDF with countersunk drywall screws coming up from the bottom. Again, the toggle clamps make it easy to remove and replace the MDF workpiece holder.
Overall, the time and thought that went into this system has been well worth the investment.